Hi all, this is Jayson from the Colossal Cave team, and I just finished up a 360-degree trailer as an immersive VR experience on Youtube targeted for Quest 2, which I felt came out pretty well. Check it out here:
You’ll need:
Unity
Premiere/ Insta 360 (you can substitute this for Blender, but it won’t be as quick)
FFMPEG -free
Hybrid -free
I’d like to share with you my process so that you too can create your own immersive videos within Unity. Please note, this project did not use ambisonic audio, and you will not find any information on it within this post. This is also not a breakdown of how to use either the Cinemachine or Recorder packages.
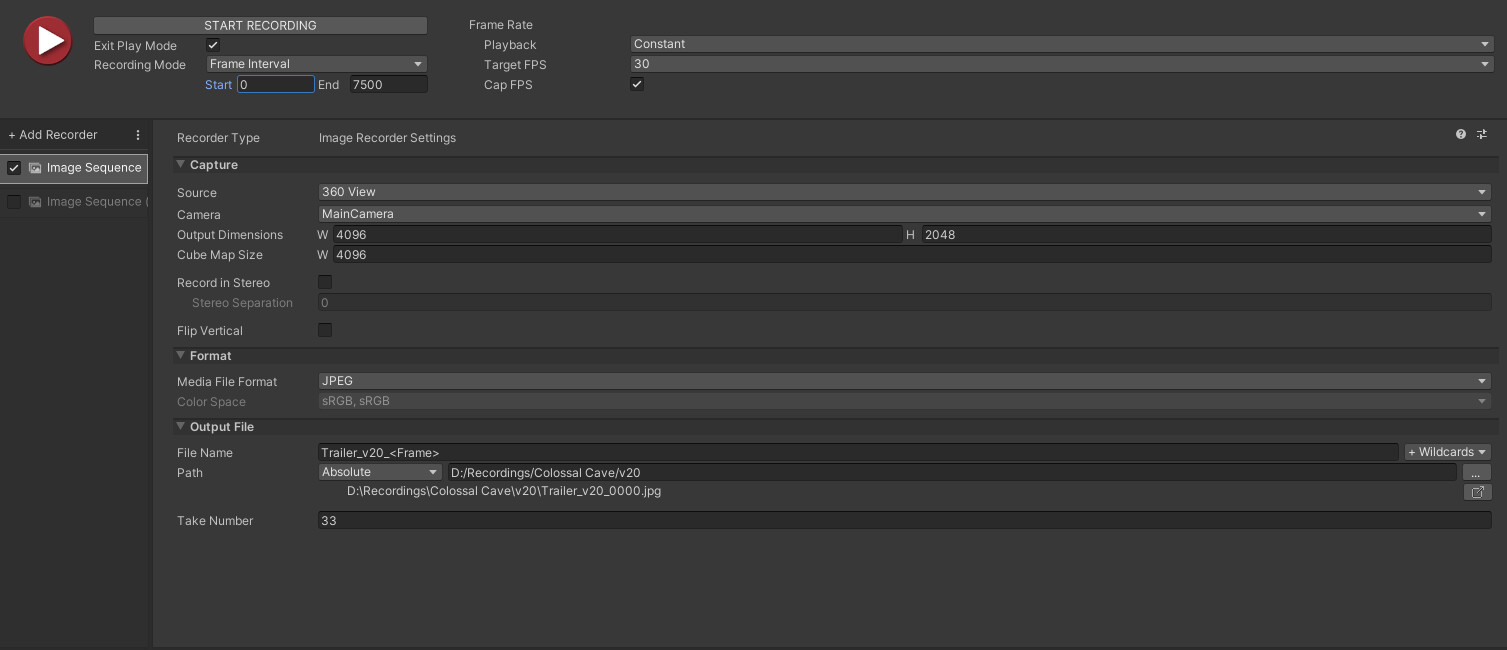
The main tools within Unity that I used for capture were Cinemachine and Unity’s Recorder– though the Recorder package on my version of Unity contains a bug!
When you create a recorder, you have the option to make the recorder camera output a 360-view, but Monoscopic doesn’t actually follow the direction of the camera.
I copied out the file from the built-in packages and modified the Monoscopic output to only use Eye.Left instead of Eye.Mono, and then adjusted the stereo separation to 0. Boom! Now the monoscopic camera will follow the Main Camera’s orientation. (Important! If Unity decides to update Recorder, and you import the package again, you may have to redo this step later in your project. Unity makes it difficult to modify their internal packages, so you’ll have to find a safe way to do that.)
With that solved, and with lots of trial-and-error, I found that the best output was 4096x2048x4096 for the cubemap. Because my computer can’t handle the realtime render in Unity’s Editor at a consistent quality, I opted to render out a JPG image sequence at 30FPS (not 60, and I’ll explain why later.) This can take a while depending on your hardware and the length of the video, so make a coffee while you wait. Note that if you run in 60FPS, you'll want to set the end frame to half of your Timeline's frames.
With the image sequence complete, you can import the sequence into Premiere and do the usual editing. I want to make a lossless version of the video that can be converted to something a bit more friendly to Youtube… We’re halfway there! Here are my output settings:
Format - Quicktime
Codec - Apple ProRes 422 HQ
Quality - 100
Frame Rate - 60
Export Color Space - Rec 709
Depth - 8-bpc
Use Maximum Render Quality
Use Video is VR
Frame Layout - Monoscopic
When it comes to hosting the 360-video, Youtube has some their own guidelines for maximum bitrate per video dimension and frame rate, with a higher maximum allowed for higher resolutions and more frames-per-second. Guidelines
Recording the images at 30FPS and rendering to 60FPS means that the data changing per frame only happens every 2 frames, which, on average, will allow your video to allocate more quality to each changing frame.
Youtube also will take your video and recompress it, so even if you give it your giant Quicktime file, there is no guarantee that it will do a good job of maintaining quality where it matters. If you have a lot of darkness and a noisy environment, expect there to be pancaking, smearing, and an overall blurry mess. It prioritizes things that are brighter on average.
You can imagine then, that carrying a point light through a tight cave with narrow passages might lead to problems.
For this project, I created a dragonfly asset with a canopy to ride on, and it was developed to cut out the top and bottom thirds of the video. The goal was to sacrifice the look-around range to maintain quality in the places that we want you to look. Film grain was also added to further prevent shadows from blotching together.
Okay, so back to converting your Quicktime, for this you can strictly use FFMPEG if you prefer typing your commands through console, but I prefer to use a UI, so I have Hybrid (which requires FFMPEG.)
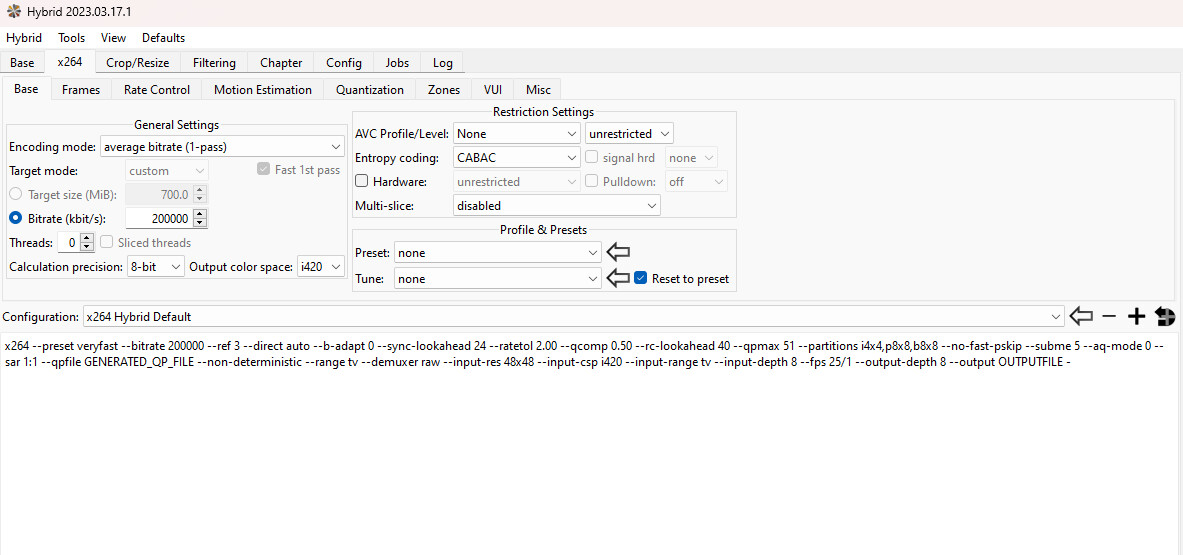
With Hybrid, you can convert the Quicktime video to mp4 and use the x.264 codec. You can set your average bitrate to something like 200000 (change AVC Profile/ Level to None and Unrestricted), include your audio, and let the job run. You’ll take that generated video, and use the Spacial Injector Tool to re encode the VR qualities, and the final video is ready!
So why didn’t you just skip the Hybrid/ Injector step if Premiere can do the same thing?
None of the videos that I generated from Premiere alone were satisfactory in terms of maintaining quality/ clarity when posting to Youtube. I tried various combinations of settings on h.264 and h.265, avi, etc. The above process was the most consistent.